
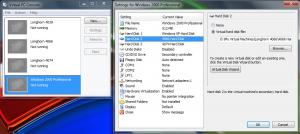
1st way:
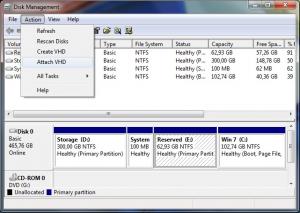
1) Start Microsoft Disk Management Tool.
2) Go to Action / Attach VHD and select the virtual disk you want to edit.
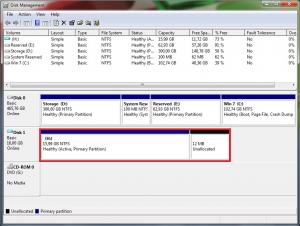
3) A new unit letter will appear on "My Computer". Open it and make the changes to the system files you need.
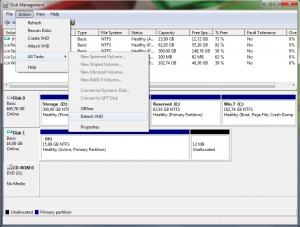
4) With the VHD selected go to Action / All tasks / Detach VHD.
It's done.
2nd way:
1) Connect the disk with the damaged install to another VM.
2) Start the VM and make the changes to the system files you need.
3) Close the VM.
It's done.
****************************
I hope it helps someone.

It's been quite useful for my "Longhorn Lab".


